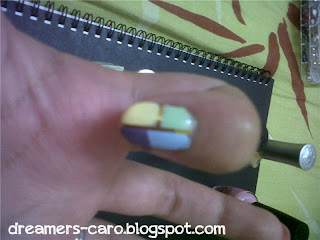
hey guys promise you all to post a post about nail tutorial
now here it is :)
are you ready for valentine?
so is time to do manicure or pedicure.
not enuf money to do so?
do it by yourself :)
look abit difficult? actually not that difficult
what you need / Ingredients:
a. beauty credit nail polish green
b. beauty credit nail polish yellow
c. beauty credit nail polish blue
d. OPI nail polish planks a lot
e. OPI nail polish i think is pink
f. some diamond
g. gold sticker * dono what it call sorry :(*
1. apply base coat
2. Apply A at 1. * a-g refer as ingredient, number refer as the place that you apply*
3.Apply C at 2.
4. Apply B to 3.
5. Apply D to 4.
5. Wait for it to dry.
*depand on what nail polish you using and how thick you apply, wait around 10 to 20 min*
6. Apply G in the mid of the nail polish.
7. Apply G in between the nail polish of the left side.
8. Apply G on the right side too.
9. Apply a top coat on it * or you can apply before 6.
after that you can just stick what every diamond that you want :)
that all for today place some comment on it let me know if i have done any wrong
my 1st nail tutorial hope you like it and support more ya
with love from caro~


how come no valentine feels geh? do some pinkish and lovey one show me eh. >.<
ReplyDeleteI really like the stunning white colored studs, looks very attractive and I can imagine the shine during night outing.
ReplyDeletehahaha caroline u can change the colour de mah i dont like too pinkish and no idea what should i do so decided to do this lo :)
ReplyDeletenava.k thanks :)
ReplyDeletelooks a little too colorful for Valentine's Day, maybe suitable if you're having a colorful Valentines :D
ReplyDeletehaha yeh maybe is really too colourful for valentine :)
ReplyDelete